
Getting Ready For Spring Riding – February 3, 2017
Winter is winding down (for most of us) and Spring is just around the corner. Here in the Northwest we’re getting the occasional bright sunny day which is nice, even though the temps are in the 30’s or 40’s. When Mr. Sun decides to shine it stirs something primal within us, making us want to get the bike back on the street (or trail). Of course if you live in warm climates where you can ride in short sleeve shirts year-round, this concept is foreign to you… we envy you, and this post won’t make sense. But for the rest of us who have had our bikes in storage we know what a couple months without riding can do to us physically and emotionally. Not good.
So… what do we need to do when we get the bike out for the first time in 2017? Here’s a short list that covers most of the bases. I’m sure I’ve forgotten something. Fill in the blank spaces as needed.
Check The Fuel Tank. Last fall when you stored the bike you treated the gas with a stabilizer, right? And you drained the carb bowl (if you have one), right? Does the fuel have a sharp “shellac” smell to it? That’s one sure sign the fuel has gone stale. Does the fuel have a layer of water floating on the top? Not a good sign – water got into the tank. If in doubt, drain the tank and replace it with fresh fuel, preferably non-ethanol grade.
Check Oil And Gear Lube. Last fall you changed the oil and gear lube, right? If you didn’t, oil contaminants sat in the engine all winter, quietly eating away at the metal. Change them after your first Spring ride, flushing out all the bad bits.
Lubricate The Pistons? Most of us won’t do this. This is something the Old-Timers would do in years past, when lubricants weren’t as developed as they are today. They would pull the spark plugs and put a bit of motor oil into each cylinder before starting the bike. During the winter all the lubrication on the cylinder walls slowly drained away, leaving a metal-to-metal contact. The oil-in-the-cylinder trick was designed to give the piston rings a fresh coat of oil for a few seconds, until the engine oil pump started lubricating things properly. These days most spark plugs are buried beneath layers of plastic, making removal of plugs a horrible task, so if that’s not gonna work for you do this: Hit the starter motor for a few seconds (with the ignition turned off). This will cycle the pistons and get the oil flowing. Repeat this process several times. Then when you start the bike, keep the RPM down for a minute so the oil pump can build pressure and lube those pistons and gears.
Inspect your clutch and brake reservoirs (hydraulic systems). If there’s a reservoir with an inspection window make sure the fluids are visible and between the lines. Also check for any signs of weeping or leaks. Most manufacturers recommend replacing clutch and brake fluid on an annual basis. I think that might be too often, so I do it once every two years. The color of the fluid will tell you if it’s time to replace. Dirty looking fluids mean there are contaminants.
If you have cable operated clutch and front brake, inspect those cables. Lube them with a special cable lube designed for that purpose. Look for signs of wear, frayed wires, loose fittings, or anything that might tip you off to impending failure. Better to replace a cable now, than to have it break when you’re 300 miles from home.
Check Engine Coolant Level. Do this before you start the bike so you’re not dealing with boiling fluids. Top off if needed. Replace the coolant if you haven’t done it recently.
Check The Tires. Put the bike up the centerstand, or somehow elevate the bike so you can spin both wheels freely, one at a time. Slowly rotate and inspect every inch of each tire. Look for cracking rubber, nails, screws, and tread depth. Every tire has a wear bar which tells you it’s time for replacement. Get new ones installed if those tires are more than 80% worn. Fresh tires will get you through the season. Worn tires will cause you headaches and they’re more prone to punctures.
Check Tire Pressures. Your MOM (Motorcycle Owner’s Manual) lists the recommended pressure for your bike, based on load and speed. The sidewall of the tire will also list a maximum pressure. Don’t exceed those pressures and don’t run the tires below recommended pressures. Over-inflated tires don’t grip the roadway, under-inflated tires overheat and are prone to sidewall failure.
Check The Chain For Lubrication. While the bike is still up on the center stand check the chain for proper lube. The chain shouldn’t show signs of rust and the chain shouldn’t be “kinked” between the sprockets. As you spin the rear wheel you should hear a nice smooth sound as the chain spins over the sprockets. Apply some lube and spin the rear wheel several times. (BTW – chains like to be lubed while they’re still warm from riding, but a cold-lube is still OK).
It’s an urban myth that O-ring or Z-ring chains don’t need any lubrication because they were lubed in the factory. Yes, they’ve got grease beneath those o-rings, but that’s just part of the lube needed to keep chains and sprockets healthy. Chains ALWAYS benefit from regular lube and periodic cleaning. Whether you use a spray can of lube or you use an on-board oiling system, your chain will be happier if you keep it lubed.
Check The Sprockets. If either sprocket has developed a hook on the teeth, it’s time to replace BOTH sprockets. Normal sprockets have teeth that are symmetrical and nicely formed. Worn sprockets have distinct hooked tooth appearance. If you install a new chain on worn sprockets, you’ll quickly wear out that new chain.
Check The Chain for Proper Tension. This should be done with the bike resting on 2 wheels. Ideally the rider should be aboard, but often that’s not possible, so do the best you can. Your MOM will tell you how much slack you need. Too loose and you could derail the chain, too tight and you’ll wear out your chain and sprockets.
Shaft Driven Motorcycles. So you don’t have a chain, instead you’re a shaftie. Usually there’s no easy way to check the gear lube levels, other than an inspection hole or overflow hole. When you changed fluids last year you checked the rear drive levels, right? If not, do it now. There shouldn’t be any discoloration or white-ish fluid in there. If there is then your gear lube is telling you it’s been contaminated. Replace it as soon as possible. Just like engine oil, gear lube likes to be replaced while it’s still warm after a short ride.
Check The Battery. If you were prudent, you kept your battery on a trickle charger during the winter months, not charging all the time, but charging about once a month, overnight. If you didn’t keep it charged it will gradually wear down. When you try to start the bike you’ll hear that dreaded click-click-click noise. Not a good thing to hear when you’re suited up and ready to head out on a trip. If your battery is more then 3 years old, it’s probably time for replacement. Better to get a fresh one now then to have it fail on the trail. As a general rule-of-thumb, if the battery is weak in the spring, it’s on it’s last legs. I’ve tried to nurse a weak battery into the riding season, and every single time I’ve done that I’ve regretted it.
Check Lights, Signals, Instruments. Turn on the ignition, check the headlight for high and low beam. Check the tail light, then check to see that the brake light comes on using BOTH the hand brake and foot brake. Check the turn signals. Replace any bulbs as needed. Finally check the instruments – are they working properly? Are you getting an ABS sensor warning? That could be a battery voltage issue.
Pre-Flight Inspection. Every rider knows they should be doing a complete pre-flight inspection of their bike. Sometimes we get complacent, thinking that everything’s working ok, when maybe it’s not. For your first ride of the year you need to be especially careful. Every nut and bolt should be looked at, every surface inspected. That sounds rather extreme but it’s actually pretty quick and easy, taking less than a minute. Look for anything amiss. You should know what to look for, after all this bike is your Baby.
Kill 2 birds with 1 stone by doing that inspection as you wash the bike. A careful wash makes you aware of each feature of the bike, plus it makes you feel good because your bike looks good. Some riders also believe that a fresh coat of wax and chrome polish makes their bike run faster. They might be right. The same might be said for freshly cleaned riding apparel.
Registration and Insurance. Check your registration and make sure it’s still valid. No sense getting a ticket on your maiden voyage. Ditto on your insurance. Check the policy dates carefully. If it’s expired call your agent before you hit the roads. If you have a policy that goes inactive during the winter months, call the agent and re-activate the plan. Don’t take the chance and rider without insurance coverage. If you’re in an accident or you’re injured you’ll be sorry.
Rider Gear. Get all your gear sorted out. Inspect for damage, tears, missing bits, and most importantly make sure it still fits. I’ve had several riding outfits shrink over the winter months, making them obsolete. Nothing worse than trying to pull up those goretex pants and discovering they won’t zip-up anymore.
Because we’re still technically in the winter months, or perhaps in the first few weeks of Spring, we’re gonna have to wear some cold weather gear. Get it sorted in advance. If it’s electric gear you wear, make sure the controller and the power supply on the bike is working properly.
Mental Preparation and Route Selection. Don’t go riding unless you’re mentally ready for the ride. Just because you’re buddy is chomping at the bit, that doesn’t mean you have to join him if you, your bike, or your gear isn’t ready.
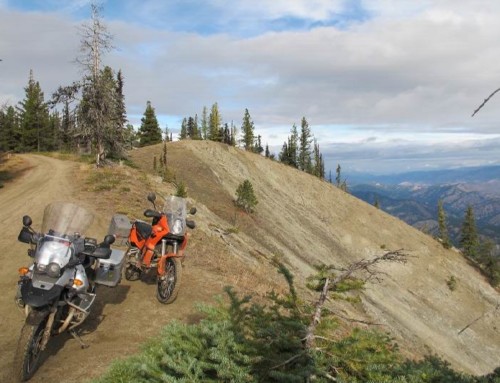
When selecting your first ride, go somewhere easy. The first ride might be the most dangerous one of the year. Motorists aren’t used to seeing bikes on the road. You’ll be wearing layers of warm weather gear so your movement may be limited. Your skills have become rusty. You don’t have that finely honed coordination you had last September. Your timing is off. You need to start slowly and rebuild your skill set over the next 5-6 rides. Ease into the process. If you’re riding with your buddies, don’t let the group’s energy suck you into some situation that’ll end in disaster. Don’t let youthful enthusiasm get ahead of your riding abilities. Don’t let a sunny day lull you into a sense of rider nirvana or complacency. It’s actually a good practice to imagine that every motorist is trying to collect a $50,000 bounty on you, dead or alive. Ride with that mentality and you’ll avoid many dangers.
Road Conditions. Late Winter and early Spring roads are usually covered with a fine layer of sand and other debris. Corners will have a thin layer of slime or other crud that’ll cause you to go down in a heartbeat. If the temps are low enough you might encounter patches of ice or frost in the shady corners. (One spring day I went for a ride when the temps were in 50’s. I took my favorite road that twisted along a river, not realizing that the hillside had shaded the roadway enough that the road never warmed up above freezing. No, I didn’t crash, but it was a close call and I had to replace some seat fabric when I got home.)
After Your Ride. Do an honest evaluation of your day in the saddle. Ask yourself whether you made any mistakes, or if you took unnecessary risks, or if you flubbed some simple technique. Don’t fool yourself – of course you did. Make a mental note to work on that technique or to restrain that behavior. If you do a post-mortem after every ride you’ll gradually improve your skills and you’ll become a safer and more proficient rider.
In summary, going out for your first ride of the season should be a joyous experience. A little bit of preparation will go a long way toward making this annual event a really good one. I’ve had more than 57 of these “first rides” since I was a young lad. Most of them turned out well, but a few didn’t because I didn’t follow the tips I listed above. I need to listen to my own advice. Don’t be like me – make all your first rides happy ones.
David Petersen
Mr. BestRest
Leave A Comment
You must be logged in to post a comment.